How To Use 3 Barrel Curling Iron on Short, Medium & Long Hair
This post may contain affiliate links, which means I'll receive a commission if you purchase through the link at no extra cost to you. Please read the full disclosure here.
Ever feel like those stunning, effortless waves you see on Pinterest and Instagram are out of reach? Struggling to get the hang of your 3-barrel curling iron and ending up with uneven waves or heat damage? You're not alone!
As a hairstylist with over 10 years of experience, I've seen countless clients wrestle with this tool. But don't worry, this guide is here to change that! Here, you'll find step-by-step tutorials on how to use a 3 barrel curling iron, complete with all the pro tips and secrets I've learned along the way.
From choosing the right heat setting to mastering different wave techniques, this guide will equip you to create salon-worthy beach waves at home at ease.
Let’s dive in!
What Is a Three-Barrel Curling Iron?
A three-barrel curling iron, also known as a triple barrel waver, is a unique styling tool designed to create beautiful, flowing waves with ease. Unlike traditional curling irons that feature a single rod, a three-barrel iron has three parallel barrels that simultaneously work to craft waves, adding volume and texture to your hair. This design allows you to style larger sections of hair at once, significantly cutting down on styling time.
The benefits of using a three-barrel curling iron are plentiful:
Delivers distinct yet flowing waves that look both defined and natural.
Accommodates wider sections of hair, reducing overall styling time, ideal for medium to long hair.
Allows for consistent waves with less effort than single-barrel irons.
Works well on all hair types, from fine to thick, effectively creating lasting waves that enhance your hair's natural movement
When considering the type of three-barrel curling iron to use, you have options such as the deep waver and the regular waver. Both tools are designed to produce wavy styles, but the deep waver offers more pronounced, defined waves due to its deeper grooves. This can be a great choice if you’re looking for a bolder, more dramatic wavy look.
My Top Picks
Best for Tighter waves: Insert Waves Here Triple Barrel Hair Waver
Best Affordable Hair Waver: Infiniti pro by Conair Triple Barrel Waver
Best Budget-friendly Hair Waver: Catch the Wave Deep Waver – Hairitage by Mindy
Best Splurge: Power Bottom Base + Jumbo Hair Waver
If you’re exploring different curling tools suited for this style, check out my recommendations on the best irons for beach waves. You’ll find deep wavers, curling irons, flat irons, wands, and more!
Essential Prep Work Before You Begin
Before you dive into creating those gorgeous waves with your three-barrel curling iron, setting the stage with some essential prep work is crucial for achieving the best results. Proper preparation not only enhances the effectiveness of your styling tool but also helps protect your hair from potential damage.
Start with Clean, Dry Hair:
Ensure your hair is freshly washed and completely dry before styling. Clean hair or second-day hair is best for this hairstyle. It will allow you to create a longer-lasting hairstyle. Additionally, if you are left with moisture in your hair from damp hair, it can lead to heat damage when exposed to high temperatures.
Detangle Thoroughly:
Smooth, tangle-free hair is key to preventing snags and breakage while using the 3 barrel curling iron. Use a wide-tooth comb or a detangling brush to gently remove any knots, starting from the ends and working your way up to the roots.
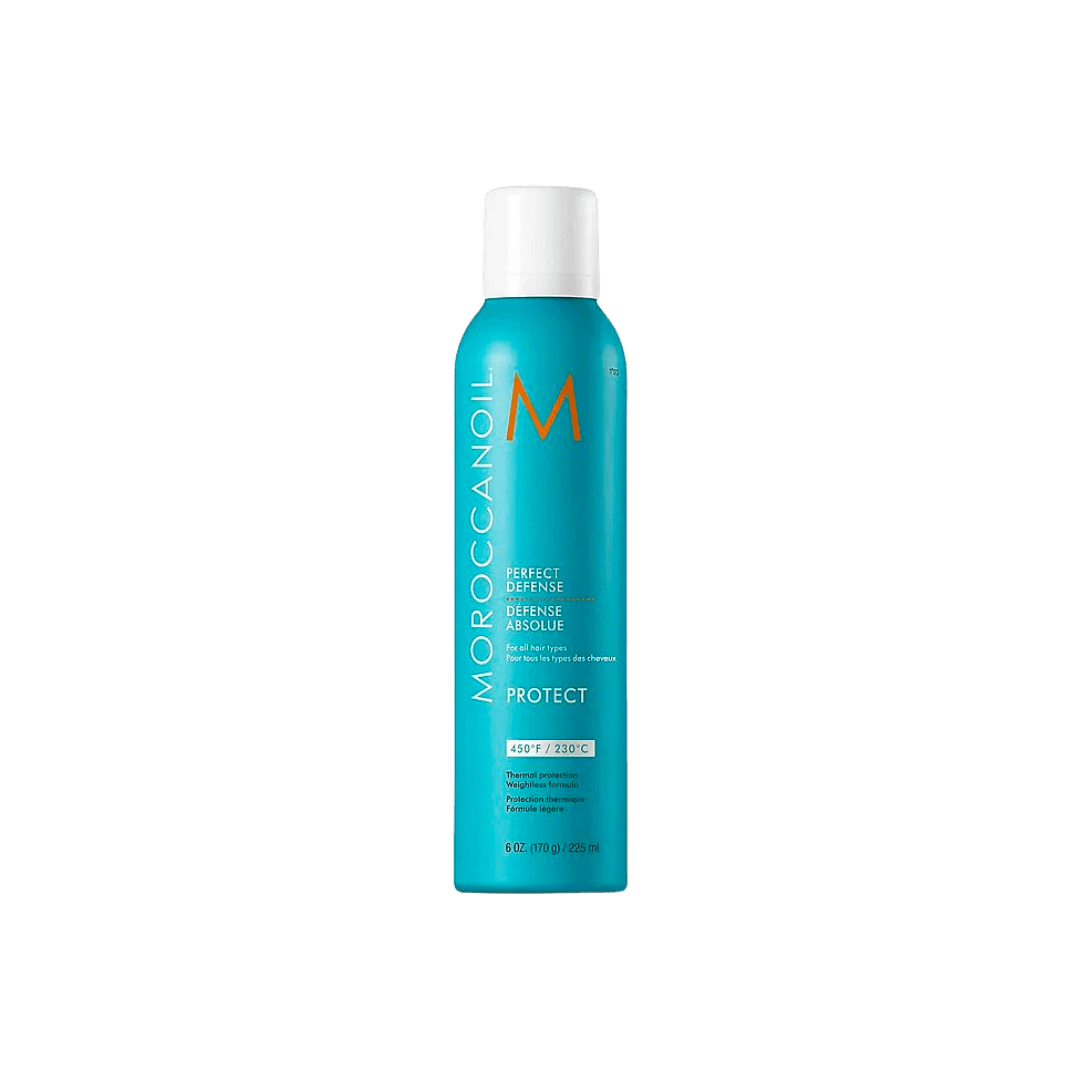
Apply Heat Protectant:
Never underestimate the importance of a good heat protectant spray. This product creates a protective barrier over the hair shaft, which helps reduce moisture loss and thermal damage during heat styling. Spritz your hair evenly before you start curling.
Section Your Hair:
Divide your hair into manageable sections. Not only does this make the styling process more organized, but it also ensures that each wave is uniform and well-defined. Use hair clips to secure sections out of the way as you work your way around your head.
How to Use a Three-Barrel Curling Iron
Now that you're excited about the effortless waves a triple barrel curling iron can create, let's get down to business! Here's a step-by-step guide to mastering this styling tool and achieving gorgeous waves that suit your hair type and desired look.
Select the Right Heat Setting:
Choose the appropriate heat setting for your hair type to prevent damage and achieve the best results.
Fine or Damaged Hair: Start with a lower heat setting (around 300°F) to avoid heat damage.
Normal Hair: A medium heat setting (around 350°F) is a good starting point.
Thick Hair: You can crank up the heat to a higher setting (around 400°F) for better wave definition, but be sure to use a heat protectant spray beforehand.
Clamp and Style:
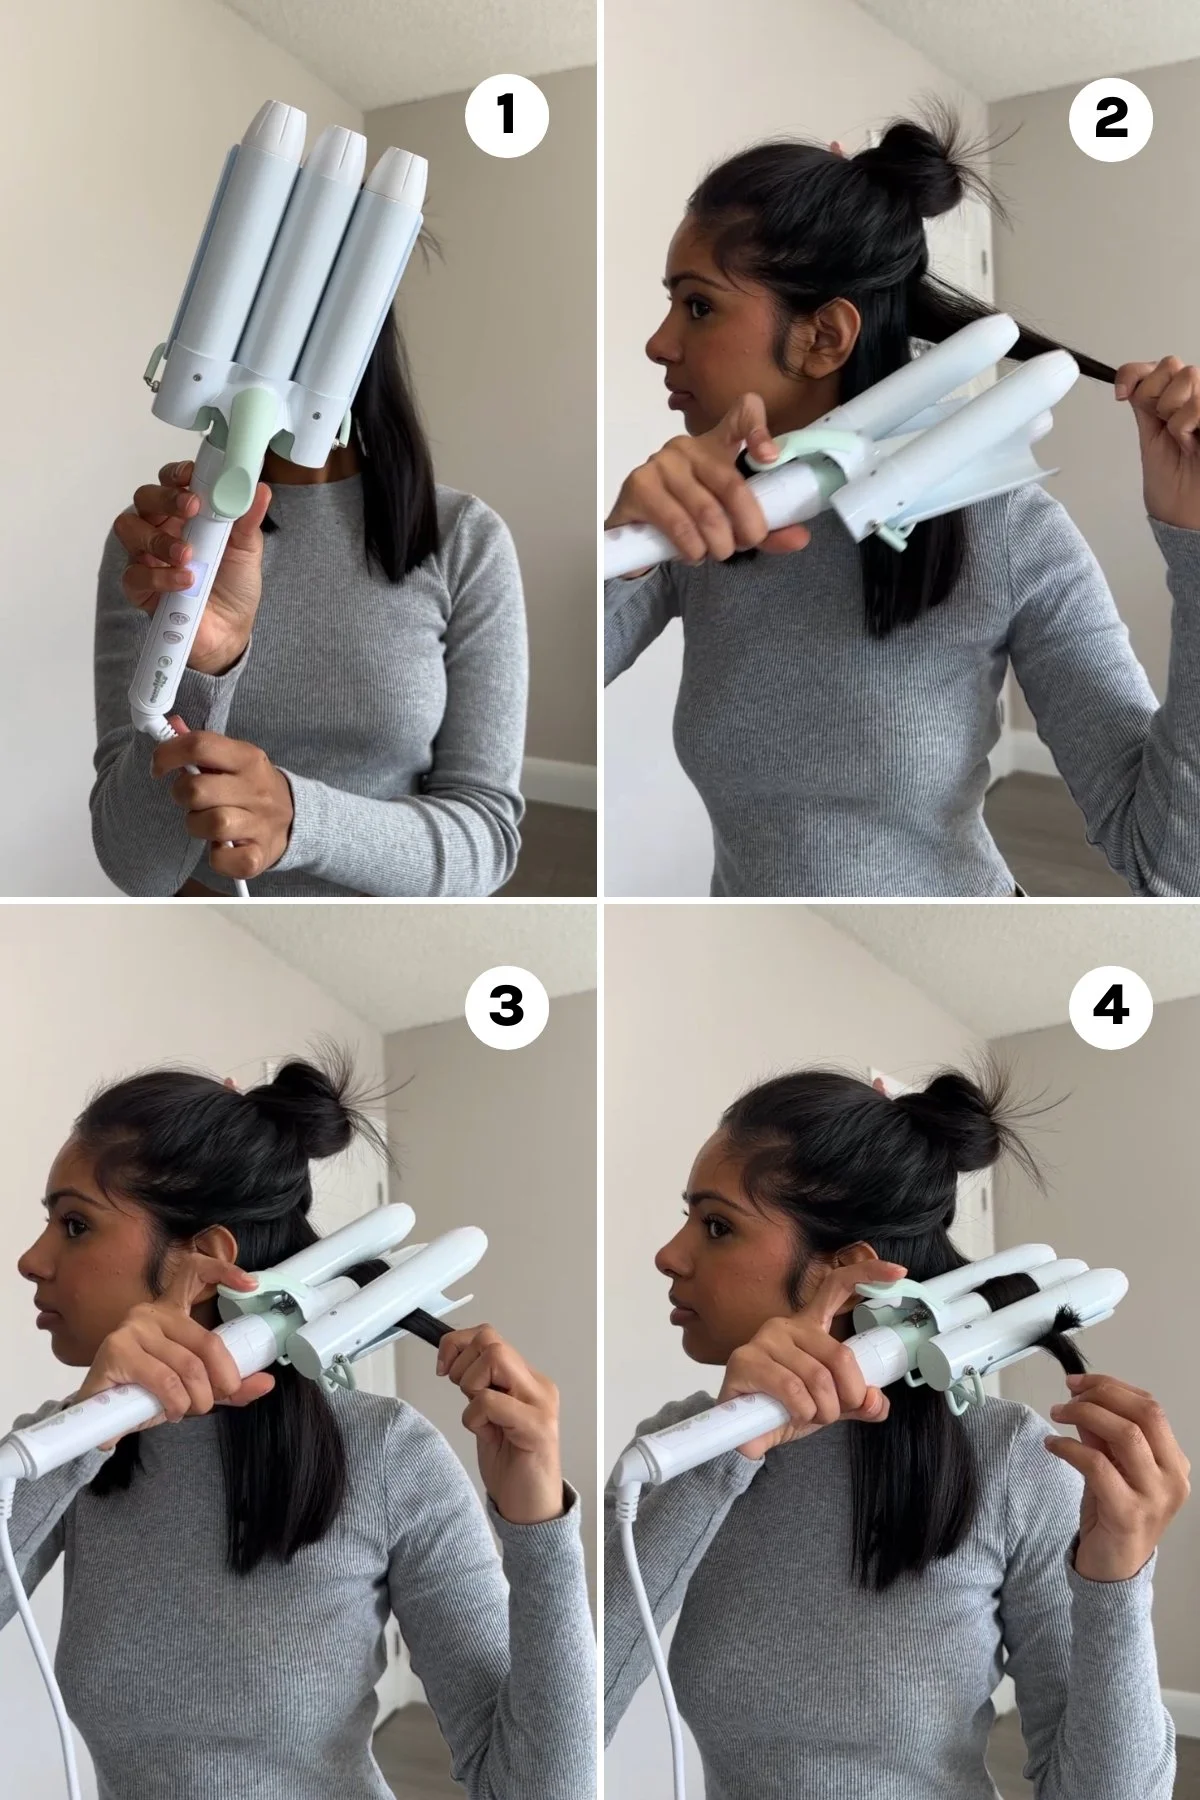
Open the clamp of your 3-barrel curling iron and take a 2-3 inch section of hair. Remember, for a more natural wave, avoid clamping too close to the roots (think 2-3 inches away). This creates a more relaxed, undone wave pattern.
When using the iron, hold it vertically for more defined waves. For a softer, more natural wave, angle the iron slightly. This technique allows you to control the wave’s intensity and ensures that your style suits your overall look.
Hold and Set:
The amount of time you hold the iron on your hair can drastically affect the outcome. For deeper, more pronounced waves, hold the iron closed on each section for about 5-8 seconds. If you prefer a gentler wave, reduce the time to 2-4 seconds.
Release and Repeat:
Gently open the clamp and slowly pull the iron down the hair section, releasing the wave. This careful motion helps preserve the shape of the wave and prevents pulling or snagging that can disrupt the curl pattern. Repeat this process throughout your hair, section by section.
If you're inspired to try different beach wave hairstyles this summer, discover my top picks for hair wavers that make it easy. Dive into my guide on 5 Hair Wavers for Easy Summer Beach Waves Hairstyles.
Setting and Finishing Your Look
Once you have styled your hair with a three-barrel curling iron, the final touches are crucial for ensuring your waves last and look their best. Here's how to properly set and finish your wavy hairstyle:
Let the Waves Cool:
Allow your waves to cool completely after styling. This step is essential as it helps set the waves and ensures they hold their shape for a longer duration. Avoid brushing or touching the waves too much while they are still warm to prevent them from losing their form.
Gently Separate the Waves:
For a more natural, effortless look, use a wide-tooth comb to gently separate the waves. Alternatively, using your fingers to lightly tousle the hair can also achieve a beautiful, undone wave effect. This technique helps to soften the waves without causing frizz or disrupting the curl pattern.
Apply Finishing Products:
To enhance the texture and longevity of your waves, consider using a finishing product. A light pomade or a texture spray can add definition and control to your style, while a beach wave spray can provide that perfect tousled, beachy look. These products help polish off the waves, making them appear more refined and styled.
Here are some of my top picks to finish the look:
How To Use a 3 Barrel Curling Iron on Short Hair
Using a three-barrel curling iron on short hair requires a slightly different technique compared to longer lengths, but with the right approach, you can still achieve beautiful, beachy waves. Here’s how to master this styling tool for short hair:
Ensure the 3 barrel curling iron is heated to the appropriate temperature for your hair type to prevent damage.
Apply a heat protectant spray and divide your hair into manageable sections to ensure even styling.
Clamp hair about 2 inches away from the roots to avoid overly tight waves and give a more natural, beachy vibe.
Leave out the ends when clamping to keep the style looking soft and natural on short hair.
After waving, apply a small amount of finishing cream to polish the waves and tame any fly aways, enhancing both the texture and shape of your style.
This method ensures that even with shorter hair, you can achieve beautifully defined, casual waves that last
How To Use a 3 Barrel Curling Iron on Medium Length Hair
Achieving perfect waves on medium-length hair with a three-barrel curling iron can be simple and effective with the right approach. Opt for a 1.25-inch barrel to produce lived-in, effortless waves that look natural and voluminous.
Follow these steps to ensure a flawless finish:
Set the curling iron to a heat level suitable for your hair type.
Apply a heat protectant spray and partition your hair into even sections.
Begin by clamping the iron about an inch away from the roots to avoid excessive volume at the scalp. This placement helps maintain a natural look.
For more defined waves, hold the iron on each section for a few seconds longer than usual. Carefully release the clamp and move down the section of hair, avoiding the very ends to prevent heat damage
Allow your hair to cool down after curling. This step is crucial as it helps the waves set and last longer.
Once cool, gently run your fingers through the waves to separate them for a softer, more natural effect. Apply a light mist of hairspray or a texture spray to add definition and hold to your style.
How To Use a 3 Barrel Waver on Long Hair
Using a three-barrel waver on long hair can create luxurious, flowing waves that are both glamorous and effortless.
Follow these steps to ensure you get the best results:
Before you start, ensure your three-barrel waver is heated to the appropriate temperature for your hair type. Long hair, especially if it's thick or treated, may require a higher setting, but it's crucial not to overheat as this can cause damage.
Apply a heat protectant spray and divide your long hair into manageable sections.
Start from the lower layers of your hair and work your way up. Clamp the waver close to the roots (but not too close to avoid heat damage to the scalp), and hold it for a few seconds before moving down the length of your hair. Repeat this process until all sections are waved.
For a defined wave, hold the waver on each section for about 4-6 seconds. If you prefer looser waves, reduce the hold time. After clamping each section, gently release the waver to avoid pulling the hair and distorting the wave pattern.
Once all sections are styled, let your hair cool. This helps set the waves. To finish, lightly run your fingers through your hair or use a wide-tooth comb for a more natural look. Avoid brushing vigorously as this can make the waves frizzy.
Use a lightweight hairspray or a spray designed for waves to help hold the style in place without weighing down your hair.
FAQs
What does a three-barrel curling iron do?
A three-barrel curling iron creates defined, natural-looking waves quickly and efficiently. Unlike single-barrel curling irons that create spirals or ringlets, a three-barrel iron produces waves by pressing and molding sections of hair between its multiple barrels.
What are the differences between a 3 barrel curling iron and a regular curling wand?
The primary difference is in the styling results. A 3 barrel curling iron creates consistent, pronounced waves and is excellent for adding volume. In contrast, a regular curling wand is used to create various types of curls from tight spirals to loose waves, depending on the technique used.
What are some quick fixes if the waves from a 3 barrel curling iron don’t turn out as expected?
If the waves are too tight or uniform, try gently brushing them out with a wide-tooth comb or your fingers to loosen them. You could also take your hair straighter and light run it throw each section to stretch the wave out. For waves that fall flat, apply a light volumizing spray or mousse and briefly reapply the curling iron to the limp sections.
Are there specific hairstyles that are more suited for a 3 barrel curling iron?
Yes, hairstyles that benefit from added volume and waves, such as beachy waves, boho chic styles, or casual tousled looks, are ideal for a 3 barrel curling iron. It’s particularly effective for longer hair that can handle the defined waves without looking overly styled.
How can I make the waves from my 3 barrel curling iron last longer throughout the day?
To ensure the longevity of your waves, start by using a heat protectant and a styling spray before curling. After styling, apply a flexible hold hairspray. For extra hold, you can also set your waves with a few clips while they cool down, which helps to lock in the wave pattern.
Conclusion
So there you have it! With these simple steps and a little practice, you'll be a 3-barrel curling iron master, creating gorgeous, long-lasting waves in no time.
Now that you've mastered the art of curling, don't forget to set and enhance those beautiful waves Explore my guide to the best hair products for beach waves to discover styling products that will add texture, definition, and long-lasting hold to your stunning new hairstyle.
And remember, practice makes perfect. The more you experiment with the 3-barrel curling iron, the more comfortable you'll become at creating a variety of wave styles to suit your mood and occasion.


